High Availability Architecture migration
A long time ago in a galaxy far, far away there was application. A pretty standard one, some UI with a Java backend and MongoDB database. After a while a few problems arose:
- once a while app crashes, so someone must restart it
- DB crashes must be handled by hand
- the same situation with backups, they are handled by a custom script
So decisions were made - the app needs to be updated:
- all crashes must be handled without user interaction
- database redundancy must be added
- automatic backup is needed
Therefore in the next chapters, we will migrate existing data to new MongoDB cluster and we will handle AWS application "upgrade".
Migrating MongoDB instance to the cluster
Having one instance of MongoDB available for the app is fine (😉). It is cheap and fast to create and deploy. Manage it also doesn't require too much effort. But it comes with few drawbacks - when something goes wrong and your instance goes down you have to bring it back online. This forces you to think about backups/snapshots, configurations, connections and so one. And this is a thing that no one wants to do it.
Instead of that, we can have a cluster, that will have redundancy, replication, automatic snapshots, so a lot of tasks will be done automatically.
Dump data from the current instance of MongoDB
The first step is to fetch all existing data from the running instance. This will be done using 'mongodump' utility. Unfortunately, I didn't have MongoDB installed on my machine, so it was obvious for me to use docker instance - I'll be able to switch mongo version in no time.
After a quick research, I've come up with bash script for making a dump for me. Most of it is boilerplate code for error handling, but the main part goes like this:
docker run --rm -v $(pwd):/workdir/ -w /workdir/ mongo:$MONG_VER mongodump --gzip --archive=/workdir/dump/dump.gz -h $SRC_HOST:$SRC_PORT -d database_name
A little bit of explanation:
- $MONG_VER - mongo version, so we can easily switch between 3.6 and 4.x
- $SRC_HOST:$SRC_PORT - points to running MongoDB instance
- -v $(pwd):/workdir - this mounts current dir as /workdir in docker instance
- --archive=/workdir/dump/dump.gz - tells 'mongodump' to create archive file in /workdir/dump/ so effectively file will be created in ./dump/ directory
Create MongoDB cluster
As MongoDB cluster provider we choose cloud.mongodb.com - guessing that those guys should have the best knowledge and experience with mongo databases. Having own cluster is not complicated, go to their site, register and create a new project. And in project dashboard hit Build a New Cluster button. Next select Cloud Provider & Region and Cluster tier.
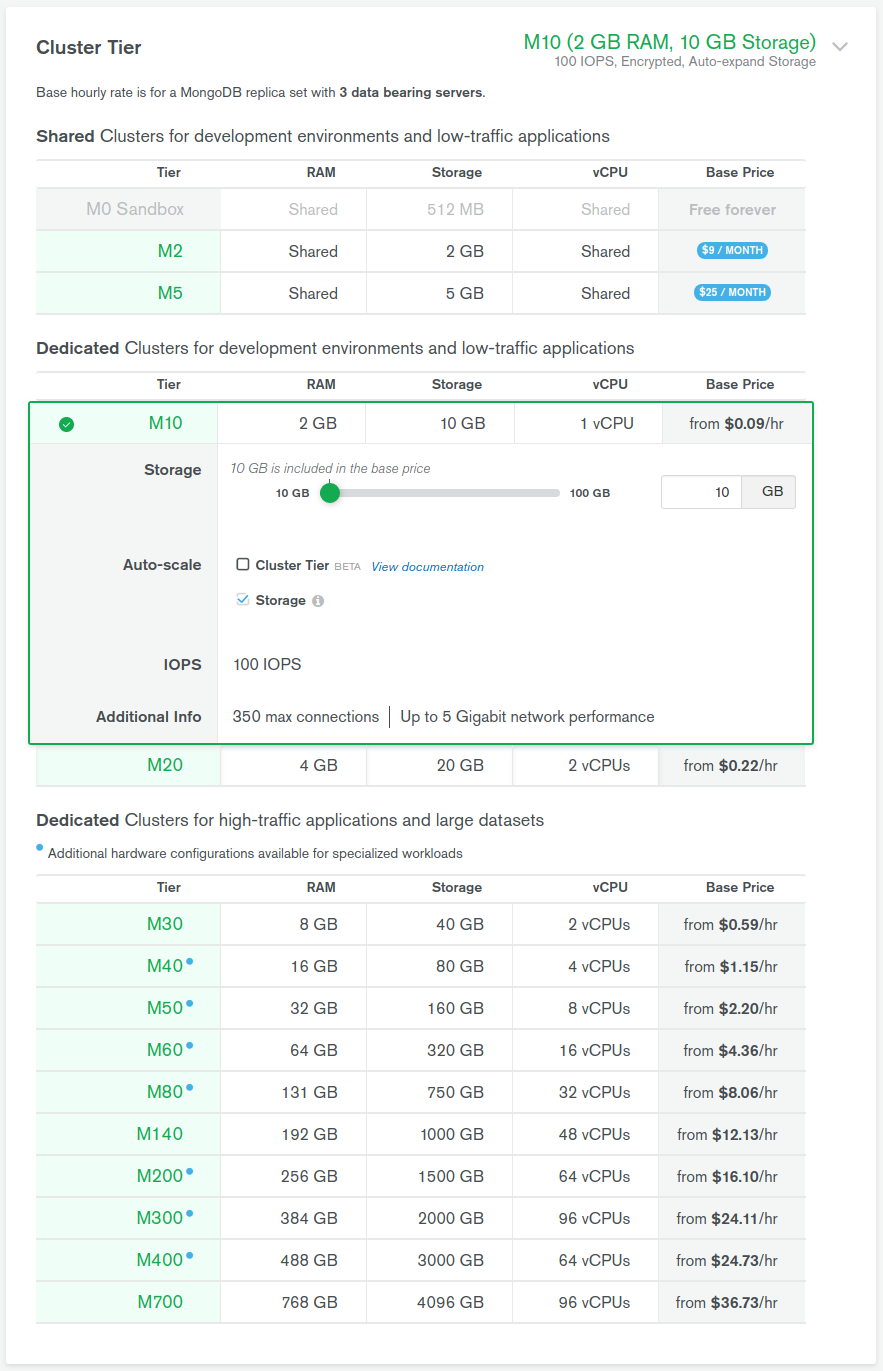
The most important thing here is to choose the appropriate cluster tier for our needs. In this case, M2 would be fine, but it has one drawback - it does not support peering (described later on):
And that is why we went with M10 cluster. In terms of backup, Cloud Provider Snapshots are enough, in that case, so we choose it. Last options are Cluster name, and naming thing is the hardest thing so after a couple of hours (😉) I was able to hit Create Cluster and after a while cluster is up and ready.
MondoDB cluster configuration
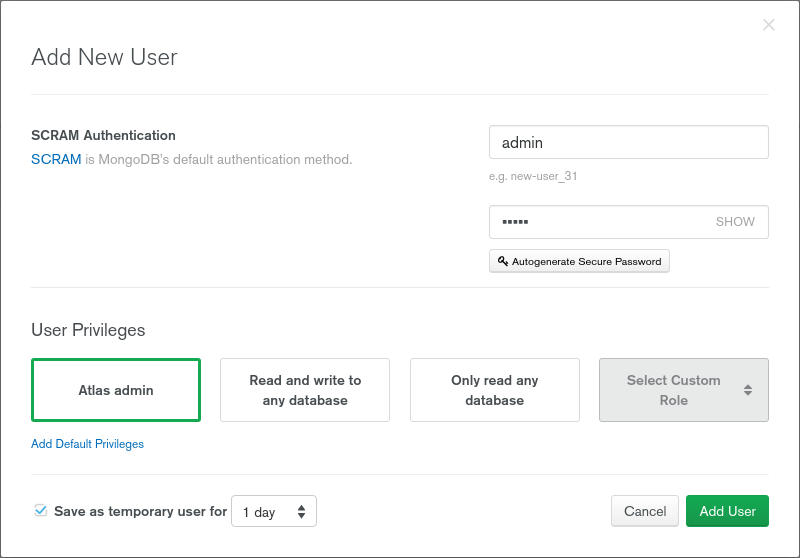
To be able to restore/import data our data we have to allow access to DB. First, we have to create a user that we will use and we can do it using Security -> Database Access menu. We have there ADD NEW USER button. After clicking it we have to fill a new user form:
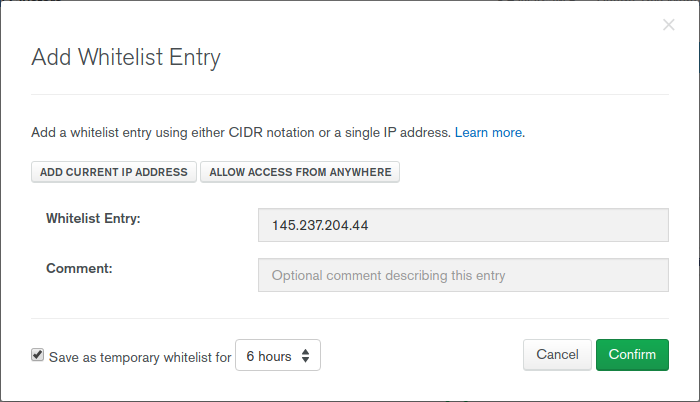
Also, we have to whitelist our IP (or IP from which restore will be done). We can do it using ADD IP ADDRESS button in Security -> Network Access. If restore is performed from our machine, then we can use ADD CURRENT IP ADDRESS button.
Restoring dumped data from MongoDB
It is time to import dumped data to the newly created cluster. Same situation here got bash script with a lot of error handling. The most important line is:
docker run --rm -v $(pwd):/workdir/ -w /workdir/ mongo:$MONG_VER mongorestore --gzip --archive=/workdir/dump/dump.gz --nsFrom=\"$SRC_DB_NAME.*\" --nsTo=\"$DEST_DB.*\" --uri=\"mongodb+srv://$DEST_USER:$DEST_PASS@$DEST_HOST/?retryWrites=true&w=majority\"
And explanation:
- $MONG_VER - mongo version, so we can easily to switch between 3.6 and 4.x,
- -v $(pwd):/workdir - this mounts current dir as /workdir in docker instance,
- --archive=/workdir/dump/dump.gz - our dump,
- $DEST_USER, $DEST_PASS - user credentials created in mongo cluster,
- $DEST_HOST - points to running mongo instance,
- $SRC_DB_NAME and $DEST_DB - allow us to rename our database, eg. original name was my-app-prod and we want to have dev instance named my-app-dev.
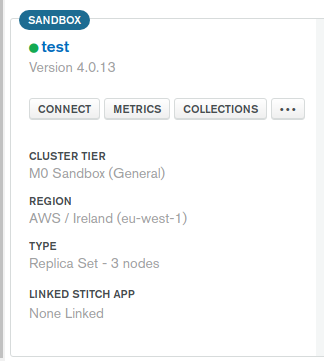
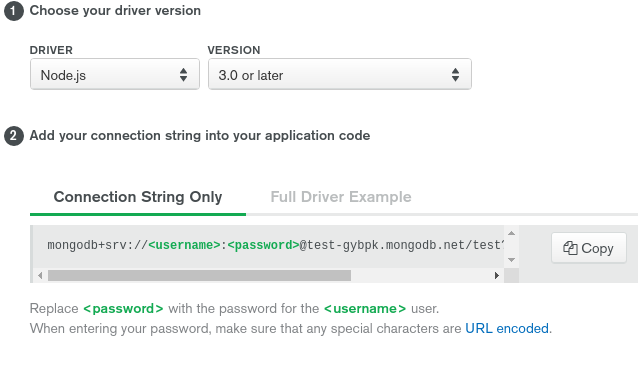
$DEST_HOST domain name of the created cluster. You can get this after clicking CONNECT on cluster dashboard:
Next pick Connect your Application
And copy host part from connection string:
And that is all folks. We have running mongo cluster with our database. Now it is time to migrate the application.
Migrating AWS app to high availability architecture
In this part, we will take care of our running app. And now instead of using UI to create/deploy we will write CloudFormation script. This will give us the possibility to quickly redeploy the app.
Let's start from the smallest parts and go up in the hierarchy.
AWS::ECS::TaskDefinition
Our application is containerized in docker, so our basic block is TaskDefinition. We define here which docker image to use and some container configuration. All parameters required by the app are exposed as Parameters.
taskdefinition:
    Type: AWS::ECS::TaskDefinition
    Properties:
      Family: !Join ['', [!Ref 'AWS::StackName', -my-app]]
      ContainerDefinitions:
        - Name: my-app
          Essential: 'true'
          Image: !Sub 012345543210.dkr.ecr.eu-west-1.amazonaws.com/my-app:${ParCltBackendImageTag}
          Memory: 768
          MemoryReservation: 128
          LogConfiguration:
            LogDriver: awslogs
            Options:
              awslogs-group: !Ref 'CloudwatchLogsGroup'
              awslogs-region: !Ref 'AWS::Region'
              awslogs-stream-prefix: my-app
          PortMappings:
            - HostPort: 80
              ContainerPort: 8080
              Protocol: 'tcp'

          Environment:
            - Name: CORS_ALLOWED_ORIGINS
              Value: !Ref ParCorsAllowedOrigin
            - Name: MAIL_FROM_ADDRESS
              Value: !Ref ParMailFromAddress
            - Name: OFFICE_EMAIL
              Value: !Ref ParOfficeEmail
            - Name: SMTP_HOST
              Value: !Ref ParSmtpHost
            - Name: SMTP_PASSWORD
              Value: !Ref ParSmtpPassword
            - Name: SMTP_PORT
              Value: !Ref ParSmtpPort
            - Name: SMTP_USERNAME
              Value: !Ref ParSmtpUser
            - Name: MONGODB_USER
              Value: !Ref ParMongoDbUser
            - Name: MONGODB_PASS
              Value: !Ref ParMongoDbPass
            - Name: MONGODB_HOST
              Value: !Ref ParMongoDbHost
            - Name: MONGODB_DATABASE
              Value: !Ref ParMongoDbDatabase
AWS::ECS::Service
Next, we wrap the app instance with service. Service that runs and maintains the requested number of tasks and associated load balancers. All traffic that goes to app goes through service listeners, so let's check them now, cause as you can see we have a dependency on two of it.
 service:
    Type: AWS::ECS::Service
    DependsOn:
      - ALBListenerHTTP
      - ALBListenerHTTPS
    Properties:
      Cluster: !Ref 'ECSCluster'
      DesiredCount: '1'
      LoadBalancers:
        - ContainerName: my-app
          ContainerPort: '8080'
          TargetGroupArn: !Ref 'ECSTG'
      Role: !Ref 'ECSServiceRole'
      TaskDefinition: !Ref 'taskdefinition'
AWS::ElasticLoadBalancingV2::Listener
Basically listeners handle all incoming traffic, we have two listeners.
ALBListenerHTTP
The first listener redirects all HTTP traffic to HTTPS port.
ALBListenerHTTP:
    Type: AWS::ElasticLoadBalancingV2::Listener
    DependsOn: ECSServiceRole
    Properties:
      DefaultActions:
        - Type: redirect
          RedirectConfig:
            Host: '#{host}'
            Path: '/#{path}'
            Port: '443'
            Protocol: 'HTTPS'
            Query: '#{query}'
            StatusCode: 'HTTP_301'
      LoadBalancerArn: !Ref 'ECSALB'
      Port: '80'
      Protocol: HTTP
ALBListenerHTTPS
HTTPS traffic are redirected to application (target group).
ALBListenerHTTPS:
    Type: AWS::ElasticLoadBalancingV2::Listener
    DependsOn: ECSServiceRole
    Properties:
      DefaultActions:
        - Type: forward
          TargetGroupArn: !Ref 'ECSTG'
      LoadBalancerArn: !Ref 'ECSALB'
      SslPolicy: 'ELBSecurityPolicy-2016-08'
      Certificates:
        - CertificateArn: 'arn:aws:acm:eu-west-1:012345543210:certificate/01234567-1234-1234-1234-123456789012'
      Port: '443'
      Protocol: HTTPS
AWS::ElasticLoadBalancingV2::TargetGroup
Specifies a target group for an Application Load Balancer or Network Load Balancer. Also it does health checks of our app. This solves our problem, when app die then will be automagically restarted.
ECSTG:
    Type: AWS::ElasticLoadBalancingV2::TargetGroup
    DependsOn: ECSALB
    Properties:
      HealthCheckIntervalSeconds: 60
      HealthCheckPath: /actuator/health
      HealthCheckProtocol: HTTPS
      HealthCheckTimeoutSeconds: 5
      HealthyThresholdCount: 2
      Name: 'CLT-ECS-Target-Groups'
      Port: 80
      Protocol: HTTP
      UnhealthyThresholdCount: 10
      VpcId: !Ref 'VpcId'
AWS::ElasticLoadBalancingV2::LoadBalancer
And now lets define out load balancer. Basically we are allowing traffic from ouw group and from chosen one in ParAllowedSecurityGroup parameter - this is UI security group.
ECSALB:
    Type: AWS::ElasticLoadBalancingV2::LoadBalancer
    Properties:
      Name: 'CLT-ECS-Load-Balancer'
      Scheme: internet-facing
      LoadBalancerAttributes:
        - Key: idle_timeout.timeout_seconds
          Value: '30'
      Subnets: !Ref 'SubnetId'
      SecurityGroups: [!Ref 'CLTEcsSecurityGroup', !Ref ParAllowedSecurityGroup]
AWS::AutoScaling::AutoScalingGroup and AWS::AutoScaling::LaunchConfiguration
This part allows us to control how much instances of our app are running. For now, we just need one instance, but when appropriate time and our app will have over 2000 million users like facebook have than we can just increase our instances count and handle traffic flawlessly (😉).
ECSAutoScalingGroup:
    Type: AWS::AutoScaling::AutoScalingGroup
    Properties:
      VPCZoneIdentifier: !Ref 'SubnetId'
      LaunchConfigurationName: !Ref 'ContainerInstances'
      MinSize: '1'
      MaxSize: !Ref 'MaxSize'
      DesiredCapacity: !Ref 'DesiredCapacity'
    CreationPolicy:
      ResourceSignal:
        Timeout: PT15M
    UpdatePolicy:
      AutoScalingReplacingUpdate:
        WillReplace: 'true'
ContainerInstances:
    Type: AWS::AutoScaling::LaunchConfiguration
    Properties:
      ImageId: !FindInMap [AWSRegionToAMI, !Ref 'AWS::Region', AMIID]
      SecurityGroups: [!Ref 'CLTEcsSecurityGroup']
      InstanceType: !Ref 'InstanceType'
      IamInstanceProfile: !Ref 'EC2InstanceProfile'
      KeyName: !Ref 'KeyName'
      UserData:
        Fn::Base64: !Sub |
          #!/bin/bash -xe
          echo ECS_CLUSTER=${ECSCluster} >> /etc/ecs/ecs.config
          yum install -y aws-cfn-bootstrap
          /opt/aws/bin/cfn-signal -e $? --stack ${AWS::StackName} --resource ECSAutoScalingGroup --region ${AWS::Region}
AWS::Route53::RecordSetGroup
Of course we have few more minor things. For example, after deploying our application we are updating api domain therefore UI is instantaneously redirected to newly created cluster.
myDNS:
    Type: AWS::Route53::RecordSetGroup
    Properties:
      HostedZoneName: !Ref ParHostedZoneName
      Comment: Zone apex alias targeted to ECSALB.
      RecordSets:
        - Name: !Ref ParDomainName
          Type: A
          AliasTarget:
            HostedZoneId: !GetAtt [ECSALB, CanonicalHostedZoneID]
            DNSName: !Join ['', ['dualstack.', !GetAtt [ECSALB, DNSName]]]
AWS::EC2::SecurityGroup and AWS::EC2::SecurityGroupIngress
We have also security groups configured. Group is only allowing traffic from own security group - to manage load balancing.
CLTEcsSecurityGroup:
    Type: AWS::EC2::SecurityGroup
    Properties:
      GroupName: 'CLT Backend Security Group'
      GroupDescription: ECS Security Group
      VpcId: !Ref 'VpcId'
CLTEcsSecurityGroupALBportsHTTP:
    # Security group that allows traffic from itself - used by ALB
    Type: AWS::EC2::SecurityGroupIngress
    Properties:
      GroupId: !Ref 'CLTEcsSecurityGroup'
      IpProtocol: tcp
      FromPort: '80'
      ToPort: '80'
      SourceSecurityGroupId: !Ref 'CLTEcsSecurityGroup'
 CLTEcsSecurityGroupALBportsHTTPS:
    Type: AWS::EC2::SecurityGroupIngress
    Properties:
      GroupId: !Ref 'CLTEcsSecurityGroup'
      IpProtocol: tcp
      FromPort: '443'
      ToPort: '443'
      SourceSecurityGroupId: !Ref 'CLTEcsSecurityGroup'
Peering configuration
A VPC peering connection is a networking connection between two VPCs that enables you to route traffic between them using private IPv4 addresses or IPv6 addresses. Instances in either VPC can communicate with each other as if they are within the same network. You can create a VPC peering connection between your own VPCs, or with a VPC in another AWS account. The VPCs can be in different regions (also known as an inter-region VPC peering connection).
You may ask why we need it? In short - security.
Longer answer. There is a connection from our application to the database. Now we have it in two different places - AWS and MongoDB (we chose AWS too, but still, those are different networks/VPCs). Of course, we can do it differently, just allow all traffic from the internet, set up login and password and we are done. Right? Right. But this solution has drawbacks:
- our cluster is available for everyone. And someone can perform bruteforce attack to gain login/password and get our data,
- of course, we can whitelist our AWS cluster, but in case of redeploying app instances we will have to do it once again, cause instances will have different IP.
All those problems are fixable by peering. Peering that connects two different VPCs (networks). And access from that private network is whitelisted. Also after redeploying app is still in that private network (external IP is a different one), so no need to update whitelist.
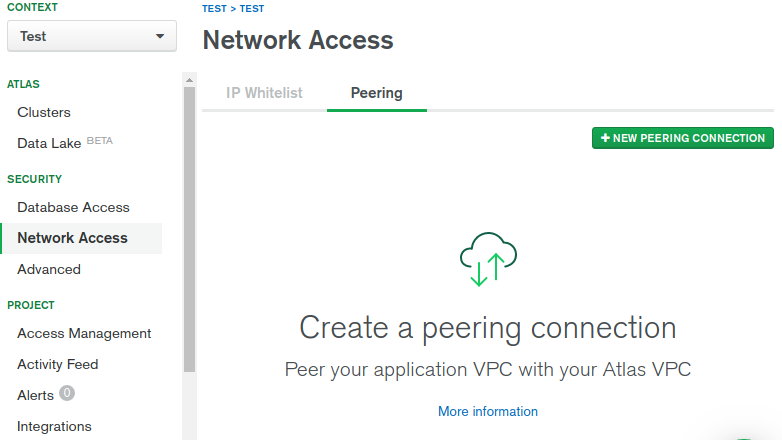
To set up peering go to your Mongo cluster Security -> Network Access -> Peering and hit NEW PEERING CONNECTION
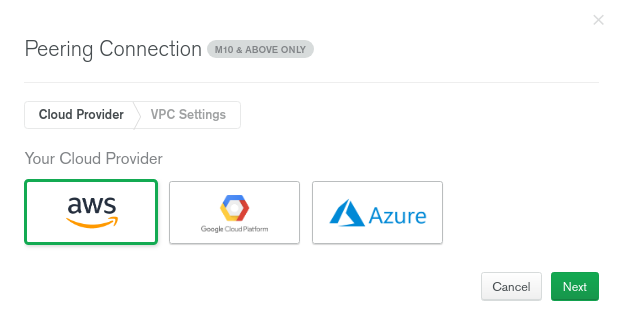
Next select cloud provider:
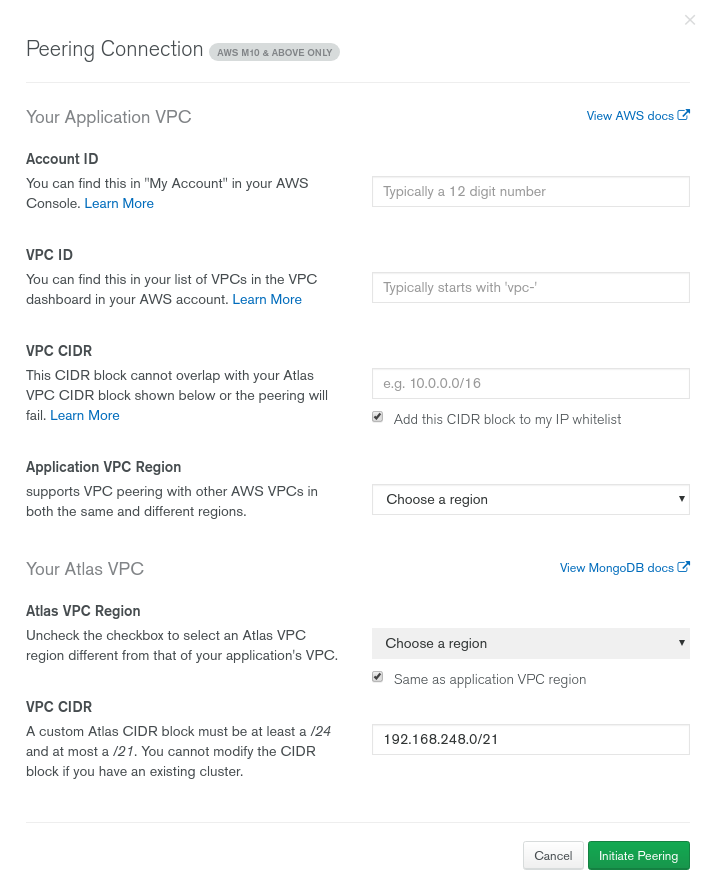
And fill up all required fields. Here we have very good help from Mongo, that tells us where we can find all the needed data.
After hitting Initiate Peering you'll have to confirm it on AWS side. Also, route table must be updated. All those things are well described on MongoDB Peering help site
Summary
At Solidstudio we can be your partner in migrating applications to high availability architecture to achieve business goals and gain the edge. Are you looking for custom software development experts? Get in touch with us to use full potential of cloud based applications.


